
Wednesday, June 15, 2011
Friday, June 3, 2011


Tuesday, April 12, 2011
Driving Assembly

This is the Driving Assembly. It was a proccess of mating, flushing, and animation. It took a lot of work to do this project.
Sunday, March 27, 2011
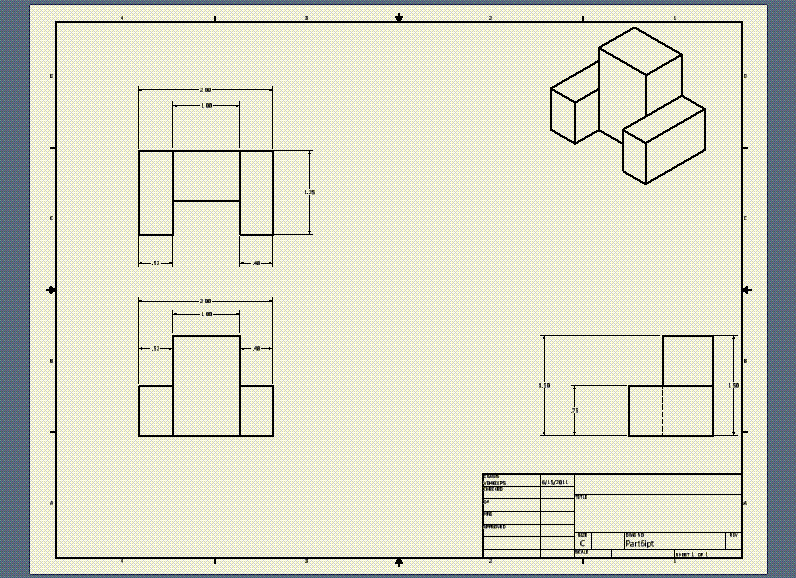
base block
 |
| This is the base block I did in Engineering Class. In this project I had to do a mixture of mating, and fixing. Also I had to do some other things to make it stay like that. |
Friday, March 11, 2011
Model features 2


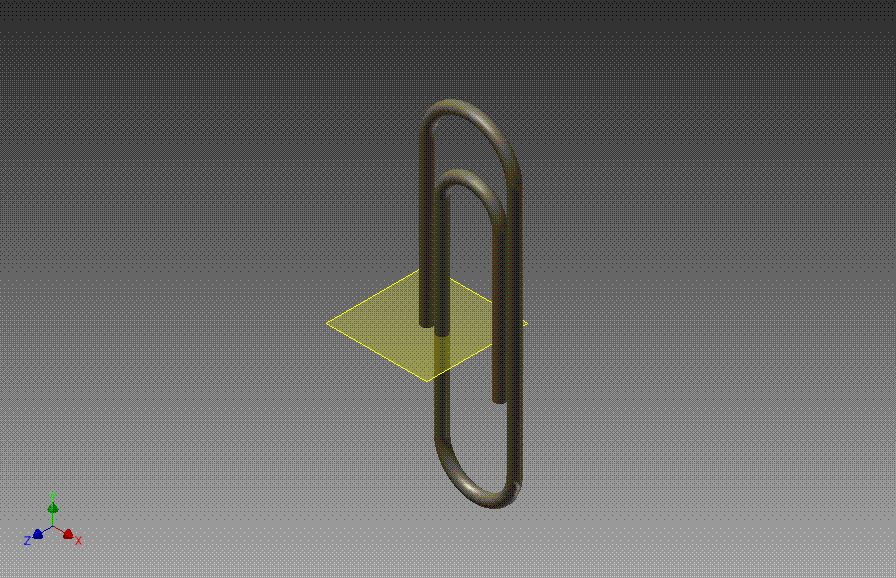


These are the model features I made on inventor. This project took a lot of work to finish it. I learned new ways to design something on inventor. Some new things I learned are chamber, decal, mirror and many more. Many people in my class found new ways of designing the different models and they had got extra points for that. Some of these pictures are the tray, and the paper clip.
Model Features


These are the model features that I did on inventor. It was over 20 different models that I did from inventor. So it was a lot of work I did and I'm so proud of my work.
The Water Bottle

This is my water bottle. I made this on inventor using the decal buttion and different other buttions to make this bottle. The picture is an angel wings and a heart in the middle.
Thursday, March 3, 2011
Animations of Cube!

This is the animated part of my cube. I animated these parts to make it come together in the end of the part. Its suppose to come together in the end as one cube.
The Blue Print of Cube!!!

This is the blue print of my cube. This shows the inside of the pieces from the cube. this shows how the pieces look individually.
Friday, February 18, 2011
The Prototype

This is the prototype of the cube. This is all the combinations I did from the sketches of cubes. I took all the combinations and put it all together so I can make a cube prototype.
Oblique Sketch

These are the oblique sketches that we did in our Engineering Class. These sketches were to help us look at how Oblique sketches are. Oblique sketches are not on an angle they are straight like in a line.
Tuesday, February 8, 2011
The Cup

This cup is made on inventor, this is the final product on the computer. Their was many steps to this project and many hours was put into effect.
The Final Cube & The Cube Sketch


This is the final cube. I did it on inventor 2011 so I could see the final product. First I made the different shapes. Then I assembled the shapes together to make the final cube.This is also the cube sketching that I did to make the ideas formy cube. This is when we did the combinations so we can connect all of them to make one cube. Each piece has to be three inches and it can't be more then five combinations to make the product. There was over twenty conmbinations total with a three, four, five, and six combinations.
The Cup Poster

This cup poster was to get ideas down for our finished product. Me and my partner designed this cup poster so that we can have ideas and see what we were going to put on the cup. This is basically to see how our finished product is going to look like after we finish it.
Tuesday, January 11, 2011
Welcome!
Hi! My name is Chelsea and I will be using this blog as a portfolio for my Engineering Design class. I will be posting my projects and examples along with a brief description of what I did. Please check back to see my work!
Subscribe to:
Comments (Atom)